

How to integrate Salesforce with Usermaven
Connecting Salesforce to Usermaven gives you a complete, unified view of your customer lifecycle. By combining your CRM data with deep product analytics, behavioral tracking, and advanced attribution, you can see the entire journey from anonymous visitor to paying customer, and beyond.
This guide walks you through the full setup, from connecting your Salesforce account to verifying that data is flowing correctly.
How the integration works (the core concept)
This is the most important thing to understand about the Salesforce integration.
Connecting Salesforce does not send your website traffic into Salesforce, and it does not create new behavioral events on its own. What it does is pull your Salesforce CRM data into Usermaven. contacts, accounts, opportunities, and deal events, and match it to the people and companies you already track.
Here's the key concept:
Usermaven's tracking script collects behavioral data, page views, clicks, sign-ups, and other events, for every visitor and user on your website.
When you connect Salesforce, Usermaven reads your CRM data (contacts, accounts, opportunities, and deal information).
Usermaven matches Salesforce records to your tracked users, usually by email address.
Your user profiles and company accounts in Usermaven are enriched with Salesforce data, giving you a single, unified view of each customer.
Deal stages arrive as events. Opportunity stage changes are recorded as events named
deal_stage_<stage>(for example,deal_stage_closed_won), so a closed deal can back a conversion goal, count toward revenue, and be credited to the campaigns that generated it in attribution.
Because of this, the Salesforce integration is most powerful when you already have the Usermaven tracking script installed, are identifying your users, and have let the initial sync complete (see Step2 below).
Prerequisites
Before you start, make sure you have:
An active Usermaven workspace with the Usermaven tracking script installed on your website.
A Salesforce account with permission to authorize third-party apps. You'll need a Salesforce user with access to the records you want to sync (contacts, accounts, opportunities).
Admin or workspace-settings access in Usermaven to connect integrations.
Note: You don't need a Salesforce administrator account, but the user who authorizes the connection must be able to log in to Salesforce and grant access to the data Usermaven will read.
Step-by-step setup guide
Step1: Connect Salesforce to Usermaven
In your Usermaven workspace, navigate to Workspace Settings → Integrations.

Tip: Use the search box at the top of the Integrations page to quickly find Salesforce.
Find Salesforce in the list and click it to begin the connection process.
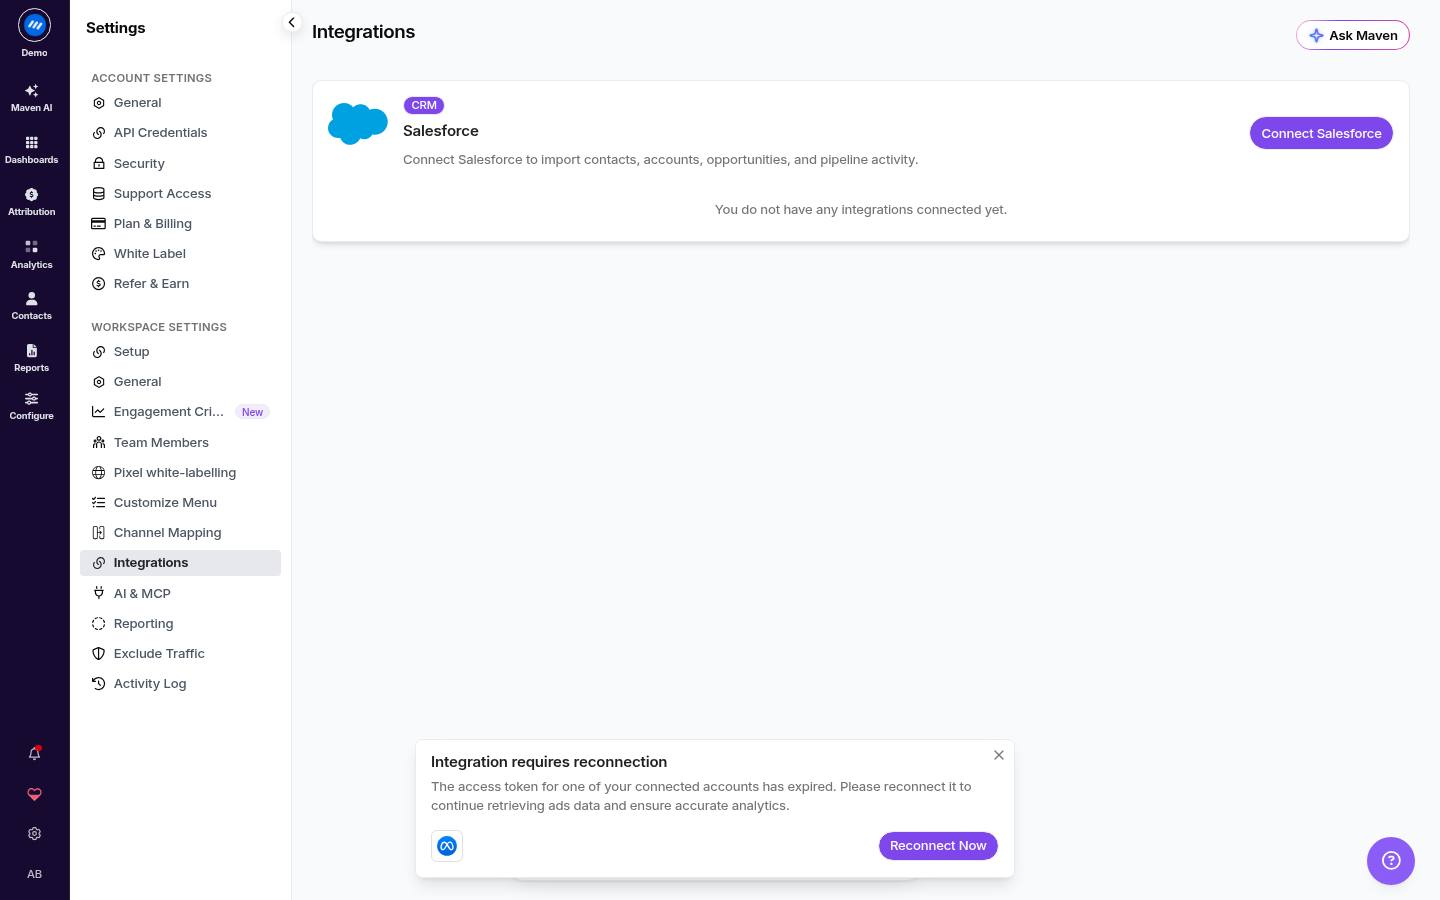
Click the Connect Salesforce button on the integration page to begin.
You will be redirected to Salesforce. Authorize access to your account to allow Usermaven to read your CRM data. Review the permissions Usermaven requests and click Allow (or the equivalent Salesforce authorization button).
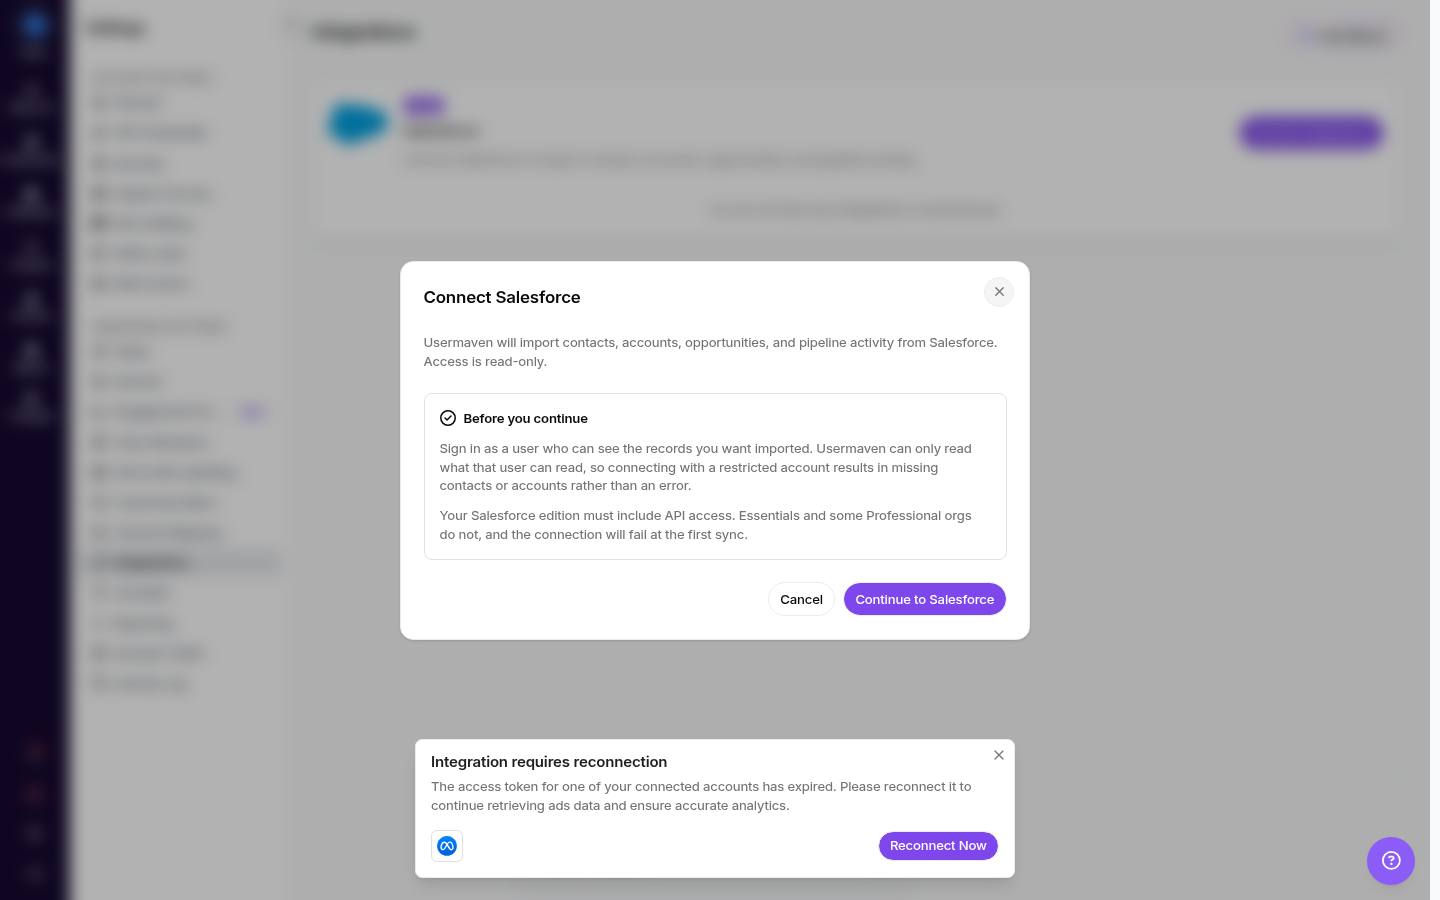
Sign in to Salesforce, review the permissions Usermaven requests, and click Allow to grant access.
You'll be redirected back to Usermaven. Once the connection succeeds, Salesforce will appear as a connected integration in your Integrations list.
After authorizing, you're returned to Usermaven and Salesforce shows as connected on the Integrations page.
Once you've connected your Salesforce account, we'll start the data sync:
Initial Sync: We begin an initial sync of your historical Salesforce data. This process may take a few hours to complete, depending on the volume of data in your account.
Scheduled Syncs: After the initial sync, Usermaven keeps your data fresh with periodic syncs, so new and updated CRM records appear in Usermaven automatically.
Step2: Identify your users
For Salesforce data to enrich the right user profiles, Usermaven needs to know who your users are. The most reliable way to do this is to identify users with a unique ID and email address that matches your Salesforce records.
Method1: Identify users on the frontend (recommended)
When a user signs up or logs in, call the id method with their details:
usermaven('id', {
 id: 'USER_12345', // Your internal database ID for the user
 email: 'sara.doe@example.com', // Must match the email in Salesforce
 created_at: '2023-01-15T09:30:00Z',
 first_name: 'Sara',
 last_name: 'Doe',
});
Matching is done primarily on email, so make sure the email you send matches the email on the Salesforce contact record.
Method2: Use server-side identification
If you must identify users from your backend, capture the anonymous_id from the browser and send it to your server to use in your first Usermaven id call:
function getUsermavenAnonymousId() {
 const cookie = document.cookie.split('; ').find((c) => c.startsWith('__eventn_id_'));
 return cookie ? cookie.split('=')[1] : null;
}

// When a user signs up, get the ID and send it to your server
const anonId = getUsermavenAnonymousId();
// fetch('/api/signup', { body: JSON.stringify({..., anonymous_id: anonId }) });
Step3: See where Salesforce data appears in Usermaven
Once the sync runs, Salesforce data shows up in several places:
Contacts Hub: Open a user's profile to see their enriched Salesforce data alongside their behavioral timeline.
Companies Hub: Salesforce account/company information enriches company profiles in Usermaven.
User & Company attributes: Salesforce fields become attributes on your profiles, which you can use for segmentation and analysis.
Open a user's profile to view their enriched Salesforce data (attributes) together with the unified Activity Timeline.
Deal events and conversion goals. Because Salesforce opportunity stage changes arrive as events such as deal_stage_closed_won, you can pick one as a conversion goal. The deal then counts toward your conversion totals and revenue, and flows through attribution like any other event — so sales-led and offline revenue can be measured next to your website and ad conversions.
How to verify the integration is working
Follow these steps to ensure data is flowing correctly:
Open your website in a new incognito browser window to ensure a fresh anonymous session.
Browse a few pages on your site. If possible, use a marketing link with UTM parameters (e.g.,
?utm_source=google).Sign up for a new account, triggering your
id(identify) call.In your Salesforce account, create a new opportunity and associate it with the contact for the email you just used.
Wait for a Usermaven sync cycle to complete (up to a few hours for the initial sync).
Check the user's profile in Usermaven:
Go to the Contacts Hub and find the user you just created.
Open their profile and view their Activity Timeline.
You should see a single, unified timeline containing all events in the correct order, plus the Salesforce data you added (e.g., the new opportunity).
Confirm the Salesforce attributes appear on the profile, this proves the record matched and enriched correctly.
The timeline shows the full journey, anonymous visit, sign-up, and the Salesforce opportunity you created, in a single unified view.
Verify in attribution and revenue reports
Because Salesforce brings deal/opportunity data into Usermaven, you can see which channels and campaigns actually drove revenue:
Open the Attribution or Revenue report in Usermaven.
Filter to a user or segment that has a Salesforce opportunity.
You should see the opportunity reflected in the report, with the marketing touchpoints that led to it.

Salesforce opportunity data flows into these reports, so you can see which channels and campaigns drove revenue.
Troubleshooting
The integration shows an error asking to reconnect
Salesforce access tokens expire periodically. Usermaven refreshes them automatically in the background. If a sync fails with a "Reconnect Salesforce" error, your connection's refresh token may need to be re-established once. Simply disconnect and reconnect Salesforce from Workspace Settings → Integrations. After that one-time reconnect, future token refreshes happen automatically without requiring another reconnect.
I don't see Salesforce data on a user profile
Confirm the user's email in Usermaven exactly matches the email on the Salesforce contact record.
Confirm the initial sync has completed (it can take a few hours).
Confirm the Salesforce user who authorized the connection has access to the records you expect to see.
The integration shows as synced but no data appears
Check the real sync status. A sync that has never run, or that is still running, no longer reports as Synced — open the integration to see its actual state, along with the reason an OAuth connection was refused, if there was one.
Disconnecting removes the data. If you disconnect Salesforce, its previously synced data is removed from Usermaven. Reconnect and let the sync run again to restore it.
Duplicates cannot inflate your metrics. Deal records are de-duplicated during sync, so the same opportunity is not counted twice.
Still stuck?
Reach out via in-app chat or email support@usermaven.com.
What's next
Once your Salesforce data is flowing into Usermaven, you can:
Analyze revenue attribution to understand which channels drive closed opportunities.
Build segments combining CRM data and behavioral data.
Track the full customer journey from first anonymous visit to paying customer.
Tip: To turn closed deals into a tracked outcome, create a conversion goal on the Salesforce deal event (for example, deal_stage_closed_won) — see How to create conversion goals.
Was this article helpful?